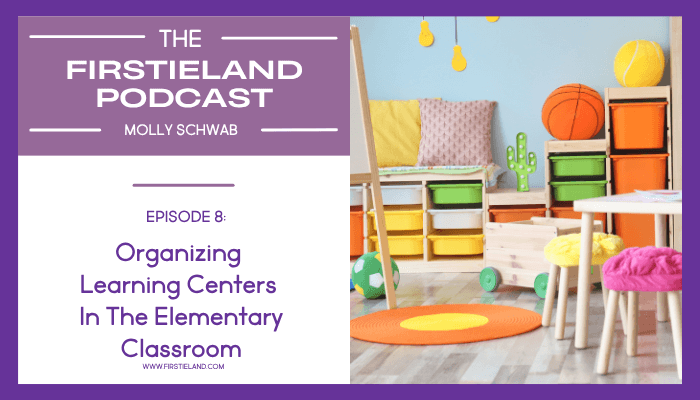
[00:01:00]
When you’re getting ready to implement classroom learning centers into your daily routine, you’re gonna need to think about three things: choosing the centers that you want in your room and setting them up, introducing your centers to your students, and finally managing your centers. So let’s begin with choosing the centers.
There are a few things to consider when deciding what centers you’ll have in your classroom. The first thing is the size of your room. How big is your room? Is it big enough to have separate areas for each math and literacy center, or are you gonna need to keep your centers in tubs that kids can take back to their own table?
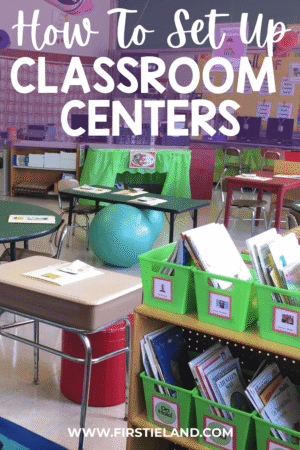
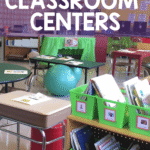
If you’re gonna have separate areas for each center, you’ll need to designate [00:02:00] each one with something that says, “I am a center,” such as small tables and chairs, maybe a desk or a small rug, a shelf, or maybe even just a basket on the floor. I usually recommend having somewhere between five to ten learning centers.
If you’re just starting out, stick with five centers that are easy for you to manage. Then, as you begin to feel more confident, you can add more centers to your classroom. I had ten in my room, and they were the library center, listening, word work, a big book and retelling center, a writing center, spelling, computers, tablets, math center, and art center.
You don’t have to begin with all of those. It’s up to you to decide which centers you’ll have room for and how many centers you want to manage. The more centers you have, the more materials you’ll need. You might want a shelf at your math center to hold all of your manipulatives. [00:03:00] And if you have a library, you’re gonna need bookshelves and probably book bins to hold all your books. Your writing center is gonna need a flat surface to write on, so you’ll need a desk or a small table for that, and of course, baskets or shelves to hold all the writing papers and pencils and stuff. So really think about which centers you’d like to have in your room and make a list of all the materials that you’re gonna need at each center.
Once you’ve made your decision, the next step is setting them all up. When you do this, you need to think about the traffic flow in your classroom. Which areas are gonna be quiet, like maybe your library or listening centers? If you have an art center, it’s good to put it near your classroom sink if you have one for easy cleanup.
You also need to make sure that you and your kids can move around the room easily so you’re not bumping into things. Good traffic flow is important. Another good idea is to draw it all out on paper [00:04:00] before you begin. Think about where the different tables will fit and where you’ll put rugs and shelves, and draw it all out before you begin. That saves a lot of time pushing furniture around the room, and it keeps your floors from getting all scratched up, which the custodians will thank you for.
You’re also gonna need to think about how many kids you’re gonna allow at each center. A lot of teachers have kids work in small groups of three or four, while other teachers will have kids work two together as partners at the centers.
I’ve tried lots of different ways of grouping kids over the years. I started out with four kids at a center, but I soon found out that the noise level was way too much for me. I tried showing them how to use a soft voice or a whisper voice, but it was never quiet enough for me. My kids always used centers during my guided reading time, and I liked it really quiet in the room during that time.
So then I tried having my kids work in pairs, but eventually I just decided upon one student at each center. I found that the [00:05:00] kids would stay on task and they’d work better if they were alone, and it cut down on fighting, arguing, and tattletales. Honestly, the kids really enjoyed having the center materials all to themselves, and my class was very quiet. So that made it so much easier for me to teach in small groups. And if kids wanted a friend to play a game with or something, we’d have special days like Friday Freedom when they could work together.
So once you decide on the number of students, you’re gonna need to designate that in some way. At the centers, you can do it with chairs. For instance, four chairs at the table means four kids are allowed at that center. You could use pictures of how many kids can visit the center, or you could even have kids clip a clothespin to a card at the center. If there are two clothespins, then two kids are allowed at the center.
After you have your centers all set up, the next step is to introduce them to your class. I think the most important step in successful learning center management is modeling [00:06:00] how to use each center. If you do anything else, don’t skip this step. A lot of teachers feel frustrated after a few days or weeks because kids are off task and they’re not using the materials the right way and basically just fooling around. But that doesn’t have to be the case for you!
Introduce each center one at a time and show the kids your expectations for each center. Be specific. Tell them how you want things to be put away, how to clean up the center, and how to use the materials in the right way. Give examples of what they should and shouldn’t do. The way you can do this is to choose one or two kids to model how to use each center.
Let them go to the center and use the materials while the rest of the class does something quietly in their seats, something like a coloring sheet, or playing with math manipulatives or Play-Doh. You can better believe that the kids at their seats are gonna be watching the two special kids that get to go to the center because [00:07:00] they want to be those kids. So as those kids are working at the center, mention things that they’re doing the right way. Say things like, “Oh, I like how Billy’s throwing his scraps in the trash can at the art center,” or, “Oh wow, Sarah’s putting the book back on the shelf in our library center the right way, great job!” Not only will those kids at the center hear you, but the rest of your class are gonna hear you too.
So after you’ve given those kids about 10 minutes at the center, gather together on the rug for a class discussion. Take a few minutes to talk about what the kids did correctly at the center and what could have gone better. You can make a simple anchor chart, maybe a T-chart for each center, and write how that center should and shouldn’t look.
Hang the chart at your center so you can remind kids what it should look and sound like and what they should be doing at the center. As an example, at my art center, our chart was divided into two, and on one side [00:08:00] it said things we should see, kids making crafts, kids playing with Play-Doh, trash in the garbage can, no talking, lids on the glue sticks. And then on the other side of the chart, it said things we should not see, scraps on the floor, dried out glue sticks, more than two kids, kids who are fooling around or arguing.
Once you’ve introduced each center in this way, you’re gonna need to create a classroom learning centers rules chart. I don’t think it’s necessary to have a chart for every center in your room, but it’s a good idea to have one general rules chart for managing your centers. Some of the different things to think about when creating your learning center rules are how many kids can be at the center, how loud can it be during center time, what are the rules for cleaning up, and what should kids be doing during center time. Keep that chart on a bulletin board so you can refer to it when you need to during the year.
Alright, [00:09:00] next, you’re gonna want to figure out a rotation schedule for the kids to follow when they’re at centers. Usually, kids are at centers when teachers are working with a small group. So think about how much time you’re gonna have for centers and how many groups you’re gonna be meeting with each day.
As an example, if you have 60 minutes, you might want to work with three small groups for 20 minutes each. So that means you’re gonna need a rotation schedule for kids to be in three different places during that time, maybe 20 minutes with you, 20 minutes at centers, and maybe 20 minutes working quietly on something at their table. I used to have my kids work in their phonics interactive notebook during that time because it took them almost exactly 20 minutes to do each activity.
There are lots of different schedules that you could have. You might want to break your time up into 15-minute segments so you can meet with four groups, and in that case, you’re gonna need to figure out another area for the rotation. Maybe some kids could be using tablets or just quietly [00:10:00] reading from their book boxes at that time. It’s up to you and what works best for your classroom schedule.
Alright, you also need to choose how you’re gonna direct kids to the centers. Some teachers use a choice board, or maybe a system where the center has a list of kids’ names and they check off their name after they’ve been there, or maybe they put a clip next to their name. I’m a really big fan of keeping things very simple because sometimes things that look super cute on Pinterest end up being a lot of work in the end. So my preferred method of keeping track of students at centers was a very simple one-page log. The log had pictures of each of our centers, and at the beginning of the week, the kids would get a new log.
Every day when it was their time to go to centers, they’d grab their log and pick a center that they hadn’t been to yet. Then at the end of center time, they checked the picture off on the log. When everyone was back at their seats, I would walk around and do what I called quick checks. [00:11:00] The kids took anything that they had completed at the center back to their table, along with their log, and laid it out in front of them. I’d quickly walk around and make sure that they had checked off their center on their log and looked at what they did at their center. I never graded center work. I personally believe that center time should be practice. So I just quickly looked to see that they were working on something, and then we were done. It literally took me about two minutes, and then we could get started on our next lesson.
Another quick tip is to designate a student to be the manager of each center. I’d put their photo at the center and a list of their responsibilities, and then at the end of center time, the managers would go over and make sure that the center was all cleaned up. If they needed to replenish any supplies, they would either do that themselves or tell me what was needed. It was a great way to make sure that the centers were always neat and cleaned up. Also, if anyone needed help at the center while I was in [00:12:00] small groups, they would go to the manager first. That way they weren’t interrupting me.
And then finally, how do you maintain and organize your center materials? It’s really important to keep them fresh and interesting because when kids visit a center and there isn’t enough paper, or the markers are all dried up, or the crayons are broken, that’s when trouble starts. So decide how often you’re gonna change out your center materials. Some teachers do this weekly. I found that to be way too time consuming for me. The way I managed my centers was to change the materials monthly. I usually used cute holiday-themed activities because it kept my kids excited and interested in coming to the centers.
Some materials at your centers are gonna remain the same all year. For instance, your library books are gonna stay the same all year, but you can add some seasonal books at the beginning of the month to get kids more excited to go there. And art supplies like Play-Doh, markers, or your fancy craft scissors, those are [00:13:00] gonna stay at your art center all year, but you can add a couple of seasonal crafts for kids to do each month, like maybe making a pumpkin in October or a turkey in November. Your math center should always have manipulatives like Unifix cubes, pattern blocks, dominoes, and dice.
So if kids finish whatever you put out for the new monthly activity or the games at their center and finish them before the time is up, they can always use the extra materials to keep them busy.
Finally, you’ll need to organize your materials so you can easily find them year after year. I used large under the bed Rubbermaid boxes. I had one for each month, and I kept them labeled in a closet in my classroom. I could easily grab the new box at the beginning of each month and set them up in about 30 minutes. Sometimes teachers will keep things in Ziploc bags or even hanging files in a cabinet. Decide if you want to organize your materials by [00:14:00] season, month, subject, or even by skills.
Alright, friends, I hope this gave you a clear roadmap and a big boost of confidence to set up and manage your own classroom centers. Just remember, start slowly, model everything and keep it fun for your students. If you haven’t already, don’t forget to grab that free Learning Centers Workbook from the show notes. It’s packed with ideas to help you plan and stay organized. Thanks so much for spending part of your day with me, and if you enjoyed this episode, I’d love it if you’d follow and leave a review. When you do that, it really helps push the podcast out so other teachers can find it too.
Alright, friends, see you next week, and remember to make learning feel like play.
[00:15:00]